Webflow DevLink – Functionalities & Benefits

On the first product update held at the end of May this year, Webflow amongst a bunch of other updates introduced an innovative feature called DevLink.
DevLink aims to bridge the gap between designers and developers, streamlining the web development process and enhancing collaboration.
Though it is still in Beta version and we haven’t yet seen its full potential, in this article, we will delve into the functionality of DevLink and explore its numerous benefits for designers, developers, and the overall web development workflow.
Understanding DevLink
At its core, DevLink is a feature that facilitates seamless collaboration between designers and developers. It acts as a communication bridge, enabling these two crucial roles to work together more efficiently.
DevLink allows designers to export the components they created using Webflow's powerful visual editor to a React application, essentially allowing developers to use those components on a separate coding environment from Webflow, giving them access to the perks of the React.js platform to bring those designs to life.
How DevLink works in Webflow?
The first thing to know, as we briefly mentioned earlier, is that the Webflow Devlink feature is currently on the open beta and to get access you need to sign up for it with a Webflow account email address. The second thing is that DevLink for the moment is supported only in the Next.js React framework.
If you happen to be unfamiliar with React, click this Webflow guide to learn how to set up your new Next.js project.
After you do that, make sure to run “npm run dev” to make sure your project runs successfully, and then move to the steps below on how to connect your Webflow project with your local developer environment:
- Start a Webflow project
- By right-clicking on an element, select Create Component

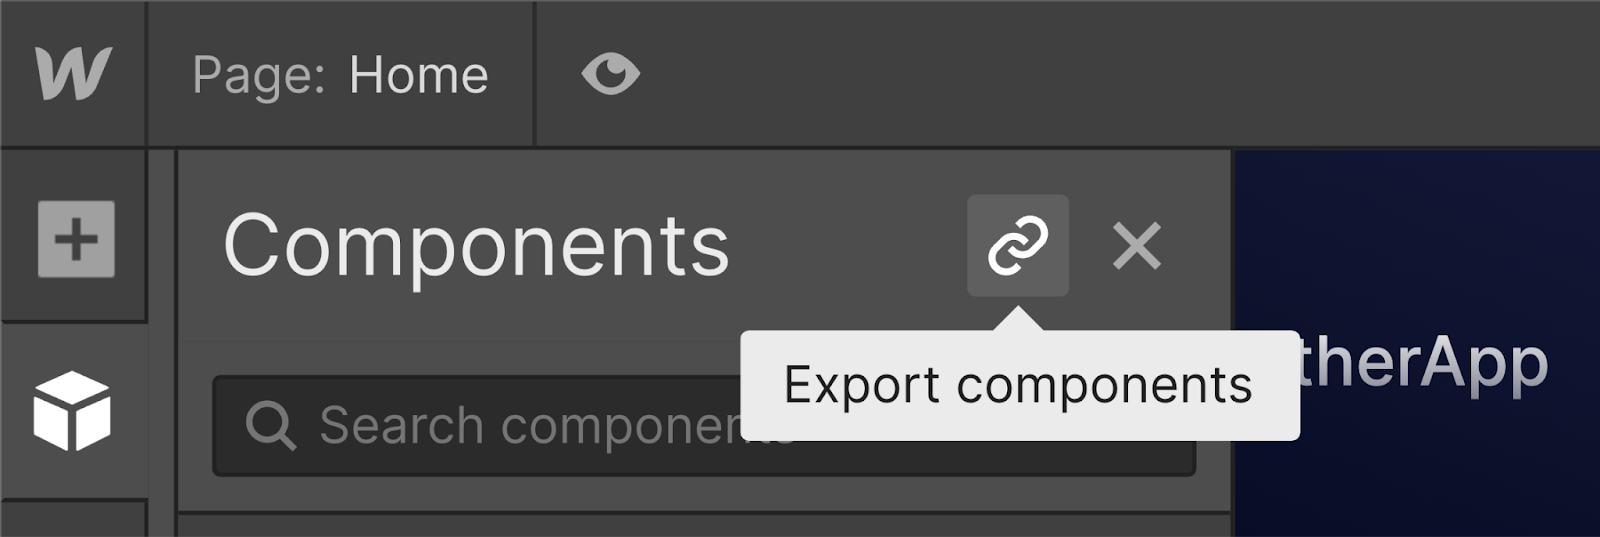
- Go to the component menu and click the Export components button
- Afterward, copy the .webflowrc.js file you see in the DevLink window that pops up, and paste it into a new file in the root directory of your Next.js project.
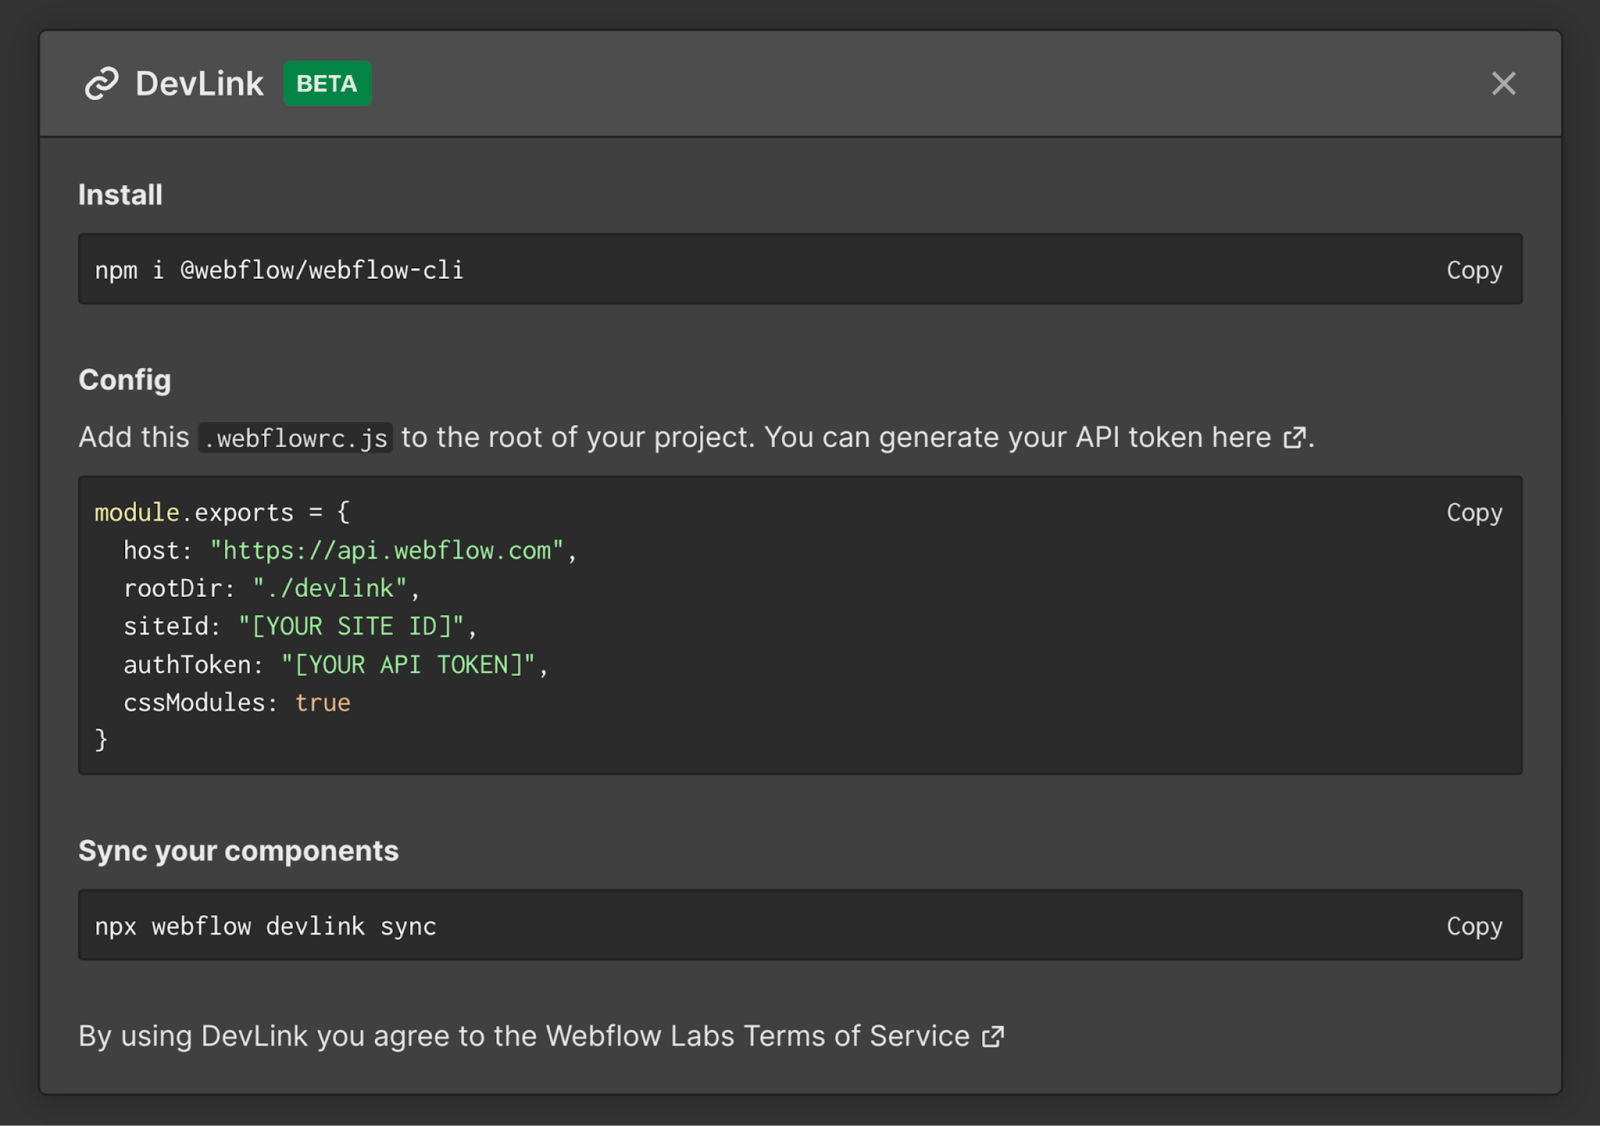
Also, you need to replace the “[YOUR API TOKEN]” placeholder with an API access token from your site. You can click here to learn how to generate an API key or also you can click on the button at the Config part description, as can be seen in the image above.
There is alternatively another method that you can use without storing the token in plain text, check the Webflow guide for that and other more in-depth Webflow DevLink details.
- Save the file
After you complete this, there are two more main steps to do:
- Installing the NPM module - just run the command below in the terminal’s root directory of your next.js project.

- Sync your components to your next.js project (every time you make a change on your Webflow canvas)
To do that, copy the npx webflow devlink sync text which you can find in the export window above, and enter it in the terminal’s root directory. That will result in your components being synced to your next.js project, and import them on your app.
Keep in mind that not all Webflow elements can be exported with DevLink.
Elements like: Collection List, Ecommerce elements (Cart, Add to cart, Web Payments, PayPal), Lottie Animations and Lightbox are not supported.
Benefits of DevLink in Webflow
DevLink is the bridge that allows us to easily “join together” two different code environments. It brings to the table more design interactivity and better dynamic experiences.
Not only that but with two platforms coming together, there are many other benefits:
1. Enhanced Collaboration between Designers and Developers
DevLink enhances communication and collaboration between designers and developers. It allows you to create production-ready Webflow React components visually in the canvas. This streamlines the process of translating designs into functional code, making collaboration between design and development teams more efficient.
2. Streamlined Web Development Process
With Webflow DevLink, designers can focus on designing and prototyping without worrying about the technical implementation. Developers can access the design files and easily extract CSS styles and assets, reducing time spent on manual coding tasks. This streamlined process eliminates unnecessary back-and-forth iterations and accelerates the development timeline, bringing new products and apps to the market more quickly.
3. Increased Efficiency and Productivity
By utilizing DevLink, designers can make changes to the design in real-time, and developers can instantly see those updates. This immediate feedback loop eliminates the need for time-consuming design handoffs. As a result, productivity is boosted, and project timelines can be significantly reduced.
4. Reduced Dependency on Coding Expertise
By bringing the power of Webflow's visual development platform to React projects, Devlink enables users to leverage the power of Webflow's no-code visual canvas. They can build UI components, create complex interactions and animations without the need for coding and seamlessly translate those visual designs into clean, semantic code ready for production.
Utilizing DevLink Effectively
To maximize the benefits of DevLink, it is essential to use some best practices.
Establishing clear communication channels is very important. Communicating with the developers on what the design should be, how it should look from a static perspective or an implemented perspective, having feedback sessions, etc, can help ensure that everyone is on the same page throughout the development process.
Another best practice is to make sure that your Webflow components; all the design elements and design portions are being managed in Webflow before you start changing things on your React app.
There also are two new features introduced with DevLink: Slots and Runtime props. They provide extended capabilities for some features that are not yet provided or supported natively in Webflow.
Runtime props give you the option to add more intricate properties to your components that Webflow currently does not offer, for instance, a custom onClick handler. Slots on the other hand allow you to nest components inside of components within your React project.
What to expect in the future?
DevLink is only in its beginnings and there are many exciting things promised to come in the future. With DevLink being now available only on the React platform, there is going to be support for vue.js and more frontend frameworks.
Storybook integration is also announced to come soon, and one will be able to bring React components back to the Webflow site, as momentarily DevLink works unidirectionally and doesn’t push React updates back to Webflow.
Conclusion
DevLink in Webflow revolutionizes the way designers and developers collaborate, streamlining the web development workflow and driving efficiency. By creating this bridge between two coding environments allows users to enhance both their product and work time effectiveness.
Because it is a new feature and there are not many guides that you can find out there, to learn more about DevLink you can visit the guide on Webflow University and also check out these two very helpful videos where you can visually see the guide steps being enacted and have a clearer understanding.
We encourage react designers to explore and adopt DevLink in their projects, and we look forward to future possibilities and advancements in Webflow's DevLink feature.
At Wedoflow we specialize in creating stunning Webflow templates for various industries. Take a moment to explore our collection and find the perfect template for your needs. Don’t forget to visit our blog and also follow us on our socials for the latest news and insights on web design and Webflow in particular.


-76d50c8c322d.jpg)